9 simple steps to draw the diagram of digestive system
The thought of drawing long and complex diagrams like the human digestive system in the exam gives nightmares to some students. Seeing the questions where they may have to draw such diagrams can also affect their confidence during the exam. So what should one do in such a case? The best way is to be prepared for drawing such diagrams efficiently and in a short time.
The diagram students draw in the exam should be proportionate, neatly labelled, and most importantly, they should be able to complete it in a short period of time. This can be achieved with practice and following the simple steps explained below.
Step 1
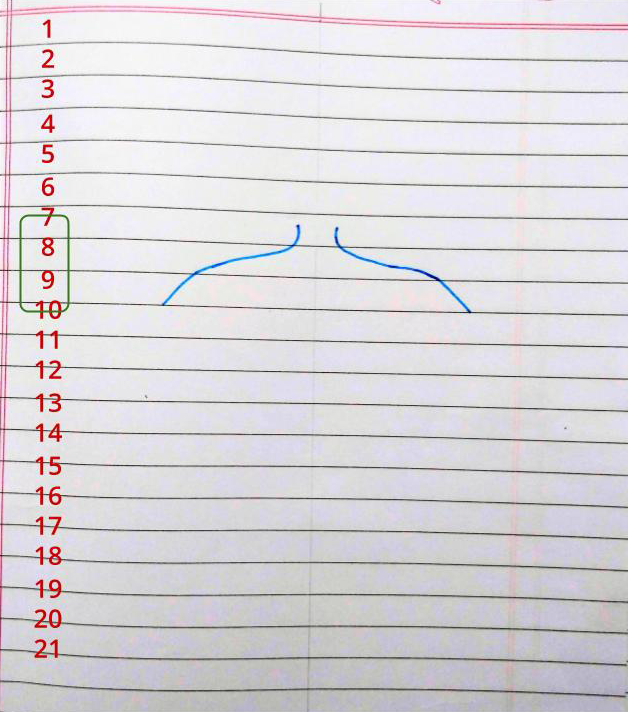
Let us draw a straight line in the middle of the page. This is going to be our reference line.
In the 8th row, we will mark two points 6 cm apart with the centre line as the middle, i.e. 3 cm on the left side and 3 cm on the right.
Let us also mark 2 points which are 1 cm apart on row 7. We will use these to draw the neck.
In row 8, let us draw the connection between the neck and the shoulder and extend it downwards in row 9 to form an outer line of hands.
Step 2
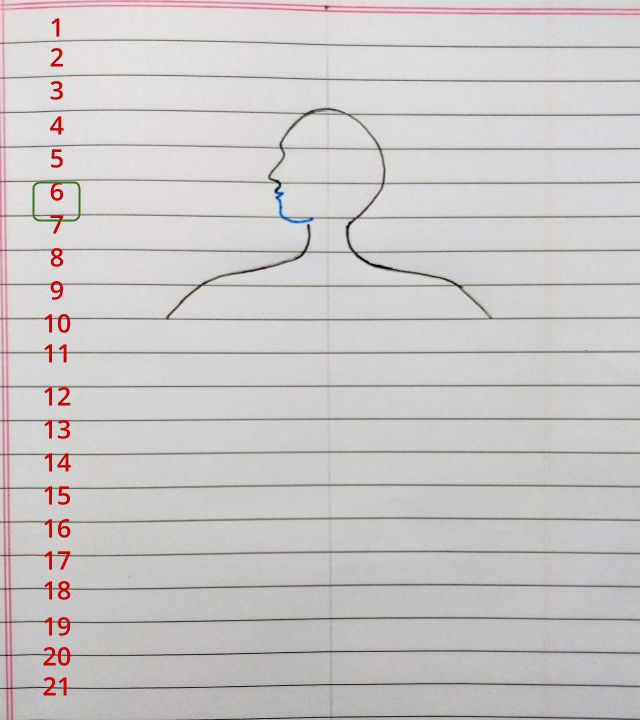
Now, starting from this point, we want to draw a semicircle on the right side of the line which extends upwards covering 3 rows.
Let us extend this line downwards on the left side to form the forehead region.
Forehead region should occupy row 4.
Moving downwards, and extending the same line, let us draw a small dent for the eye region and use the rest of the row for the nose.
In row 6, let us extend the nose region to form the outline of the upper lip, lower lip, and chin region.
That’s it! And we have the basic outline of the human upper body ready.
Step 3
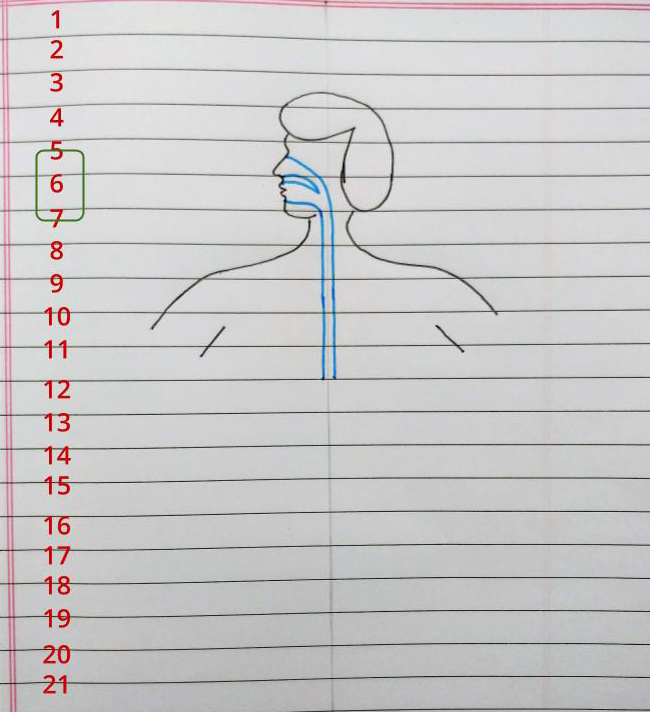
Now we want to show two cavities, buccal cavity and nasal cavity, which are connected in the throat region.
Use the small gap between nose tip and upper lip to separate the cavities.
Ok, so from the throat region, we want to draw a small open pipe like structure, which is the oesophagus.
Make sure that oesophagus is partly on the left side of the reference line and partly on the right side.
Length of the oesophagus shouldn’t be too long or too short, otherwise the alignment of the rest of the organs will change. So, we’ll keep it to a total of 5 rows i.e. row 7 to 11, beginning from the neck region.
Step 4
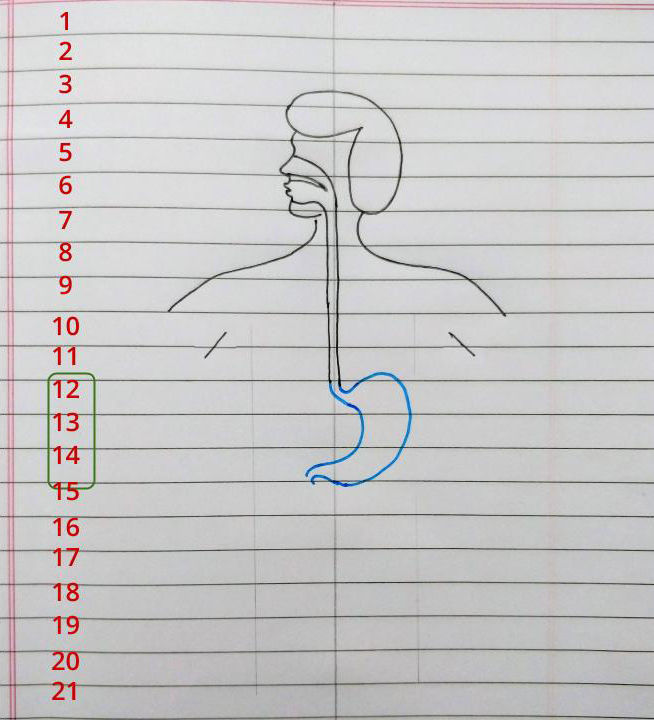
Oesophagus leads to the stomach.
For the stomach, we’ll use 3 rows i.e. row 12 to 14 but the top part of the stomach can slightly extend to the upper row.
Now, to draw the stomach, let us extend the oesophagus lines such that they form a ‘J’ shape.
Step 5
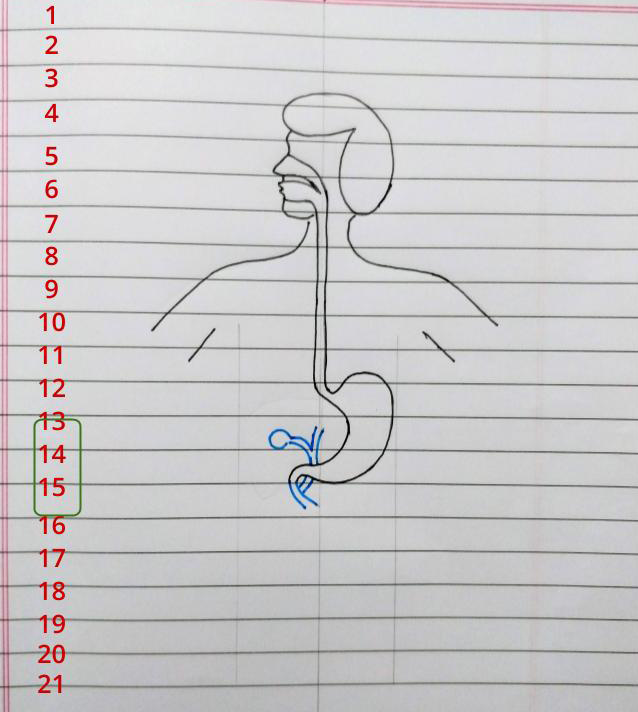
Now, let us simply extend the duodenum part with a nice bend in the row 15.
Using the gap created by the bend, we can show the region where the bile duct connects to the duodenum.
Starting from this point, draw an upward outline of the ‘Y’ structure and a small circle for the gallbladder.
The ‘Y’ structure will show the connection of the bile duct to the liver and the gallbladder.
Step 6
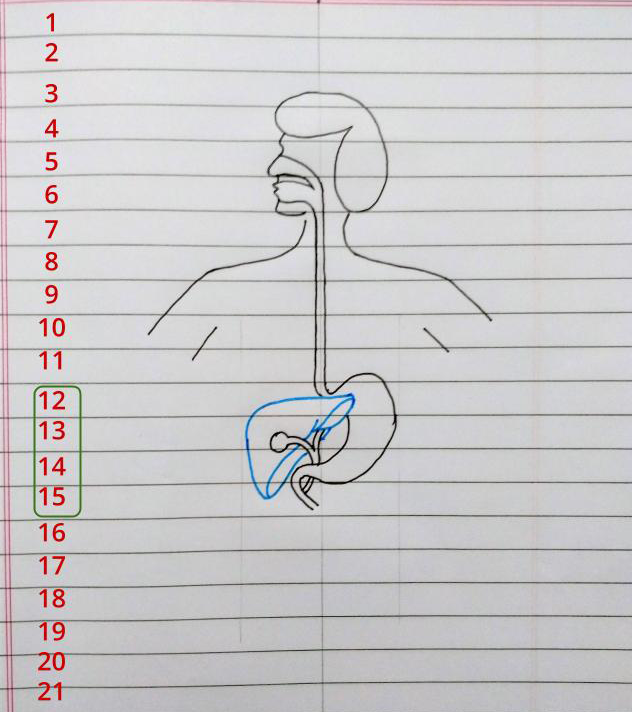
For drawing the liver, we’ll be using rows 12 to 15.
This overlaps with the stomach.
We simply need to add a triangular cap like or mushroom like structure to show the liver.
Make sure that the duct connections and the gallbladder we drew earlier are correctly located with respect to the liver.
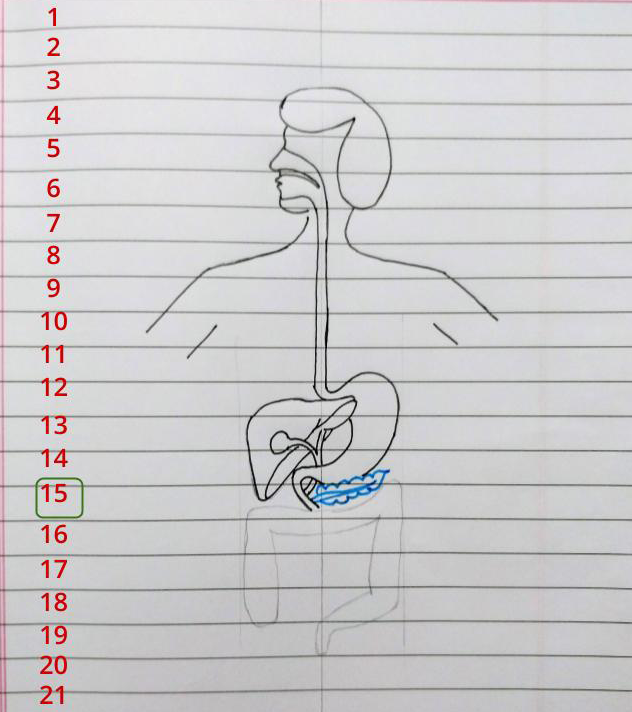
Next is the pancreas. We need only one row and it’s a simple leaf like structure that we will draw closer to the stomach.
Make sure that the central duct connecting duodenum is visible.
Step 7
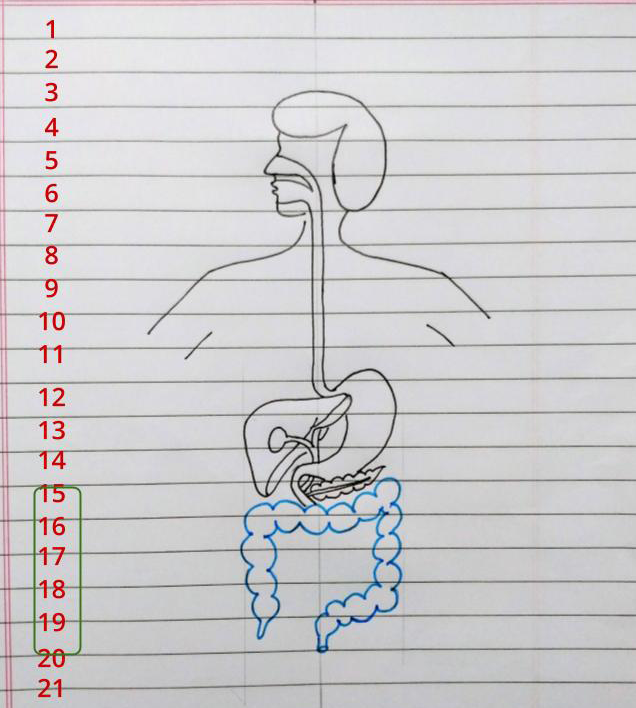
Let us draw a faint outline of the colon or large intestine.
We want the large intestine to take 5 rows, i.e. row 15 to 19.
For this outline we should draw an inverted ‘U’ like structure with double lines. This should extend from the right side and come down to row 19 to form the anus.
Start drawing curves on the lightly drawn outline of the large intestine.
Do not forget to draw a small finger like extension here, representing the appendix which is the vestigial organ present in the human body.
Step 8
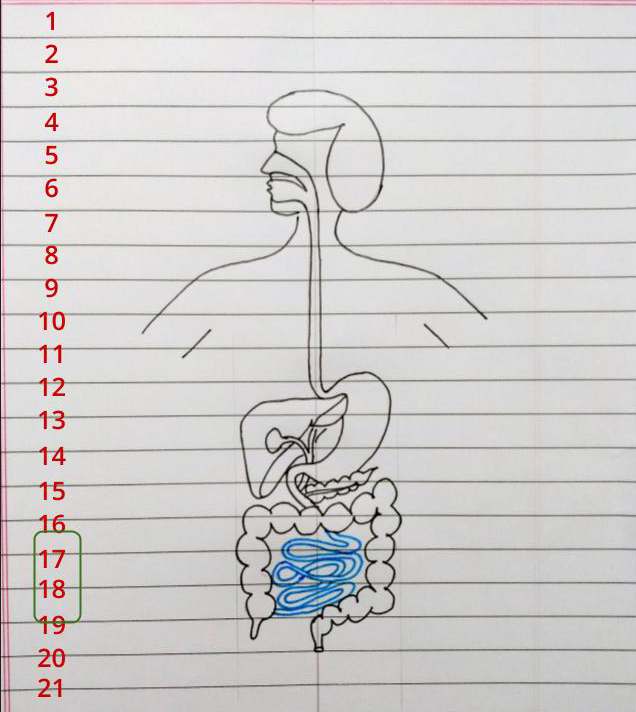
Small intestine is very long and forms loops.
Now, let us add loops of the small intestine in the space present between the large intestine.
While drawing, we must consider 2 important points –
1. The small intestine must start from the duodenum we drew earlier
2. It must
connect at the cecum part of the large intestine and in between the start and
end points we will be drawing ribbon-like structures. Basically, two parallel
lines which form loops.
Looks nice right? But we are not done yet. Now, we should erase the reference lines that we had drawn and just add a simple outline of the body.
And we are done with drawing the diagram. But.. Our diagram is still incomplete unless we add labels.
Step 9
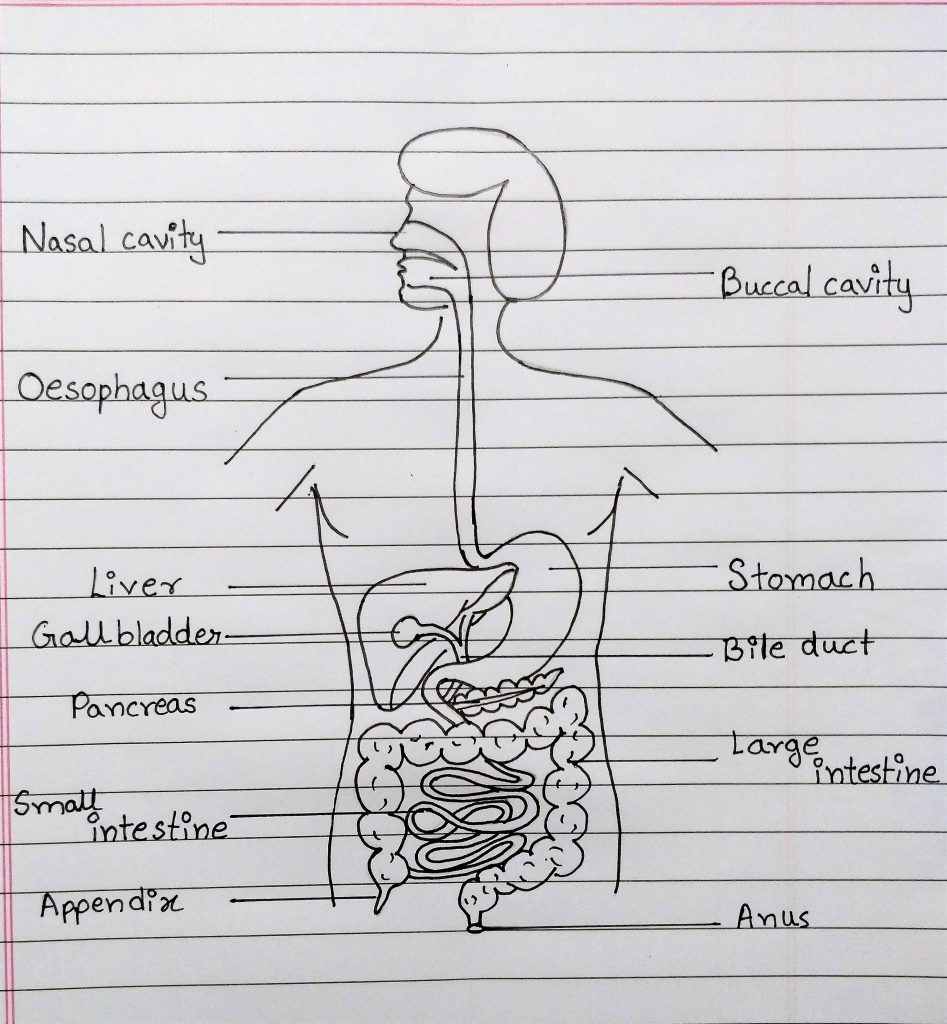
To avoid crowding of labels, we can add reference lines. These will make sure that we don’t label too close to the diagram.
Now, while practising the diagram, you can practice labelling all the parts, but in the exam, make sure that you label only the specific parts asked in the question.
We can space out the labels equally on both sides.
Then carefully erase the reference lines and add the labels.
That’s it. Our diagram of the human digestive system is complete.
You can also revise the digestion process and the function of each organ while Practising the diagram.
– Madhura Naik
